AI Coding Assistant
If you write code, an AI assistant can be a game-changer — and you don't need a cloud subscription to get one. Your local LLM can help with writing, debugging, refactoring, and explaining code, all without sending your code to anyone else's servers.
Here's how to set it up with VS Code and LMStudio.
Step 1: Enable the LMStudio Server
LMStudio can run as a background server that other apps connect to:
Open LMStudio and click the Developer Settings icon (it looks like a gear or chip — enable developer mode if you haven't already)
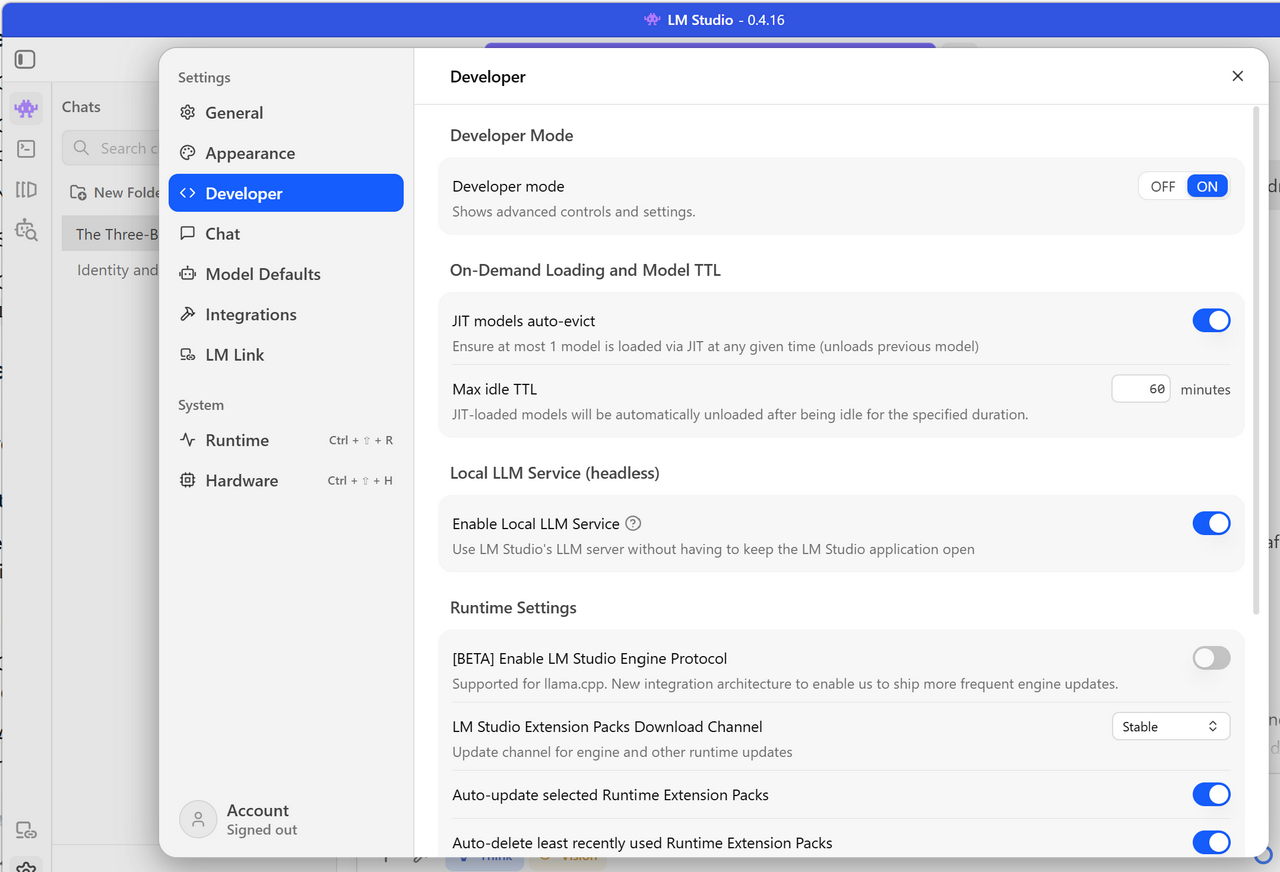
Scroll down to Local Server settings
Toggle on Start Local LLM Service — this lets the model run in the background so you don't have to keep the LMStudio chat window open
Click Start Server (you can also access this from the system tray icon)
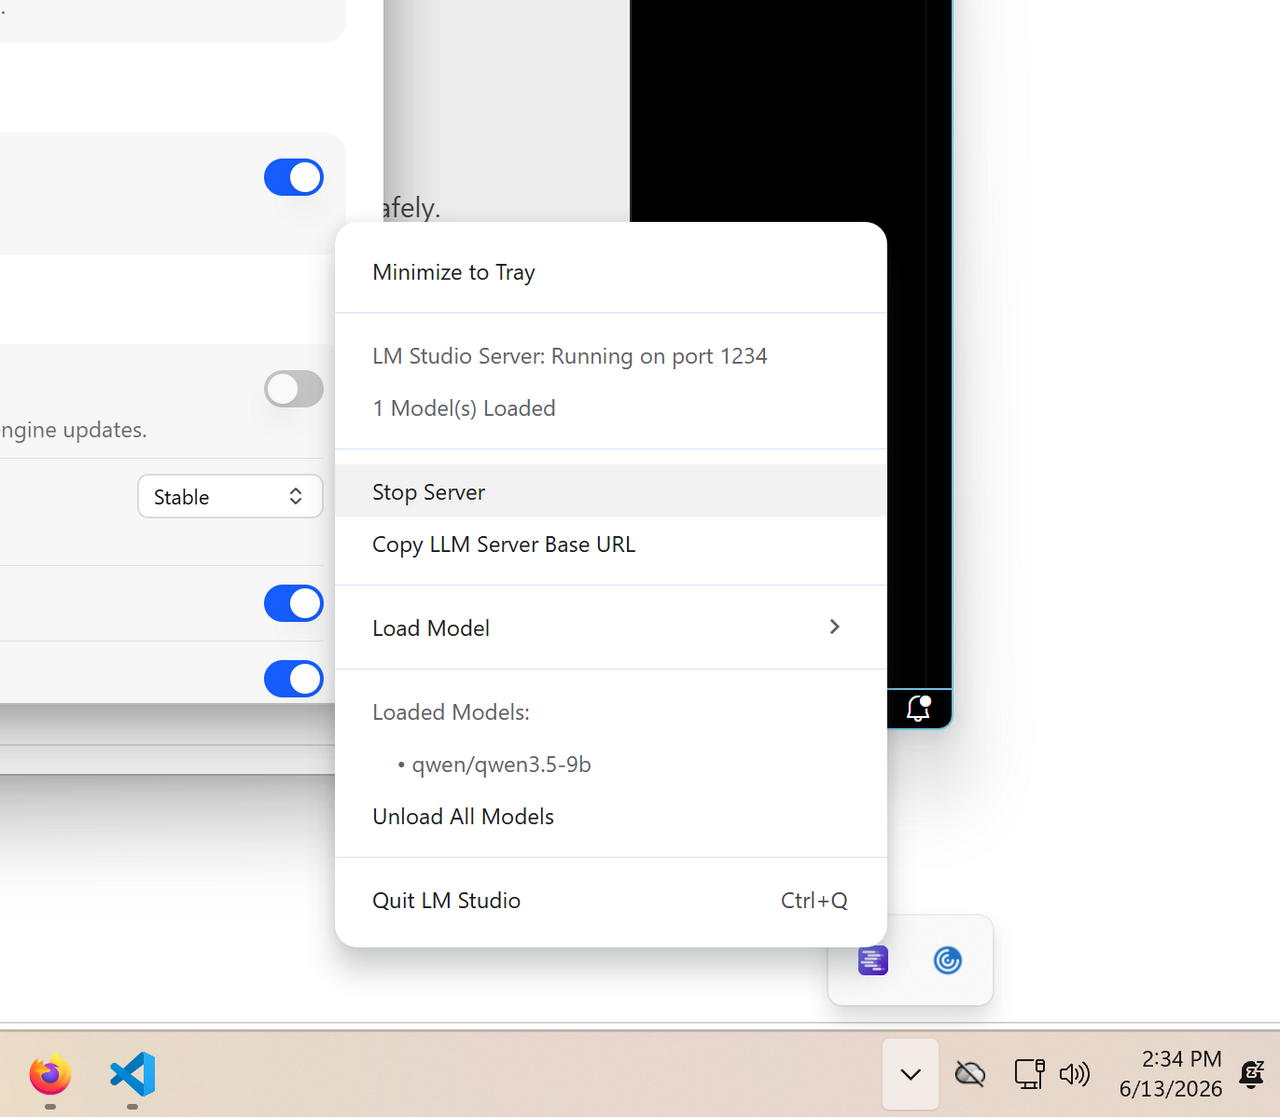
By default, LMStudio listens on localhost:1234. The server stays running as long as LMStudio is open (or as long as the background service is active).
Step 2: Install the Continue Extension
There are several VS Code extensions that connect to local LLMs. I use Continue because it's flexible, well-maintained, and supports multiple backends.
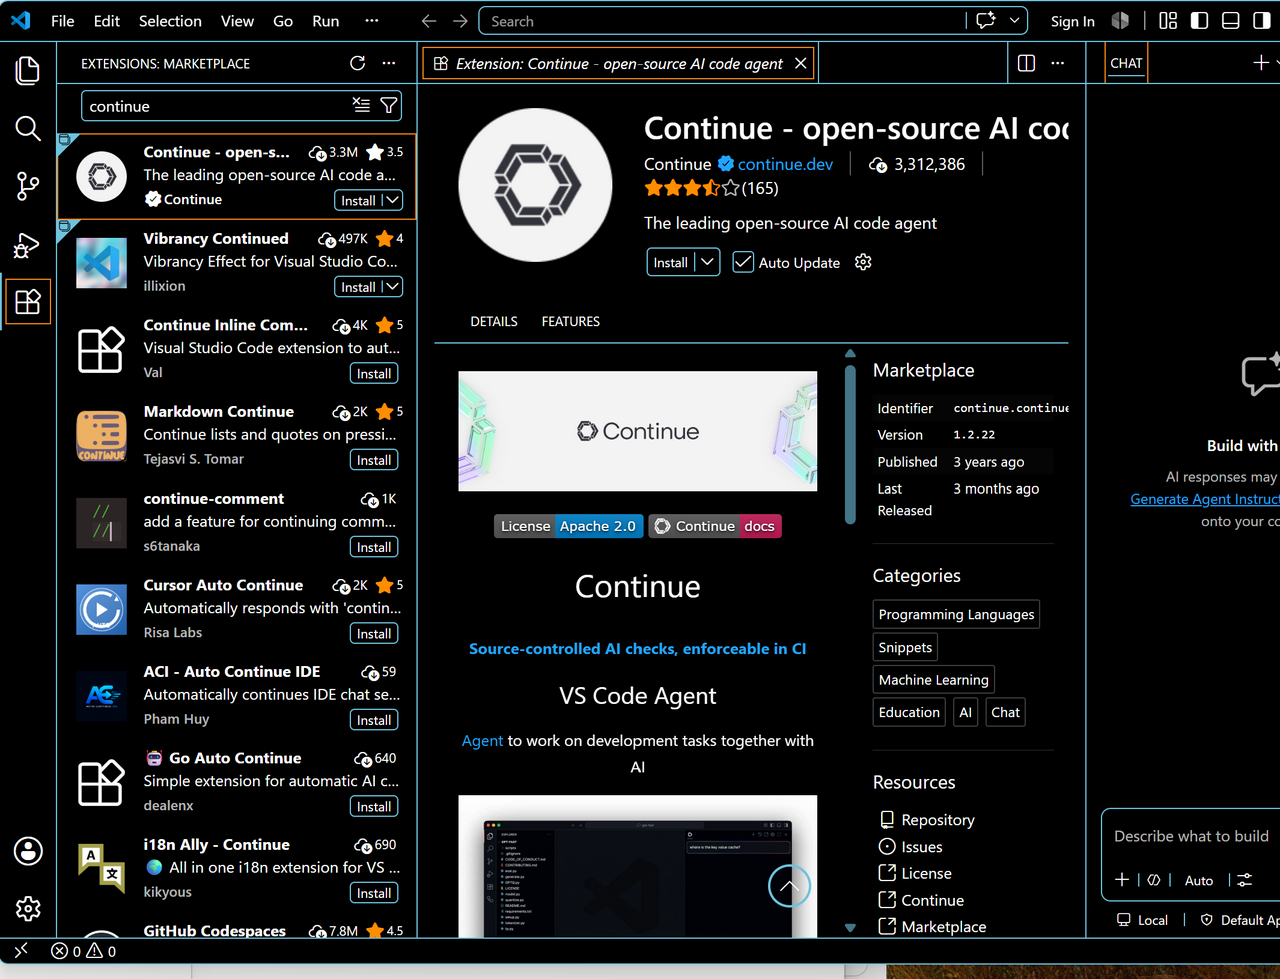
Open VS Code and go to the Extensions tab (Ctrl+Shift+X)
Search for “Continue” and install it
It supports many providers — LMStudio, llama.cpp, Ollama, and more
Step 3: Connect Continue to LMStudio
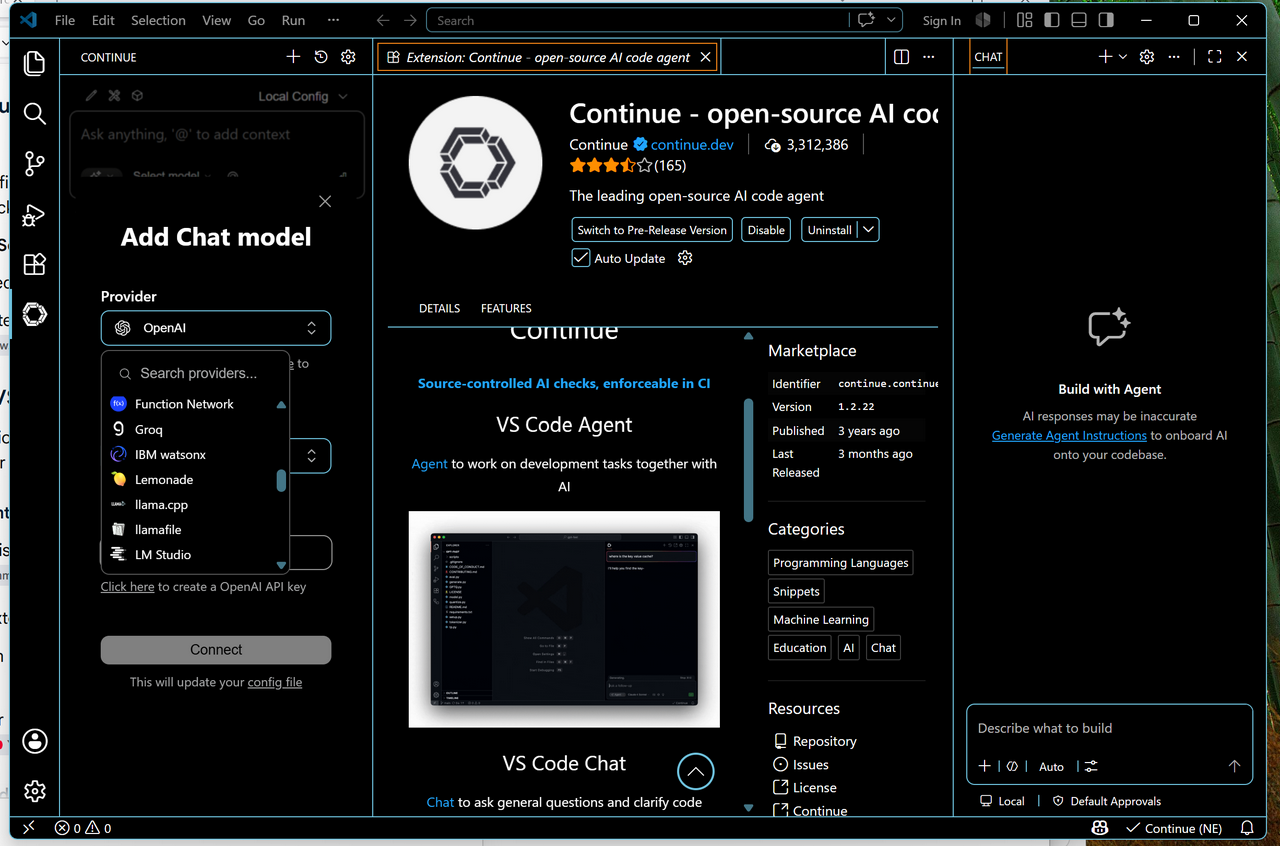
In VS Code, open the Continue configuration (click the Continue icon in the sidebar → settings)
Add a new provider and select LMStudio
Set the API base to http://localhost:1234 (LMStudio's default)
Leave the model set to Auto — Continue will pick up whatever model is loaded in LMStudio
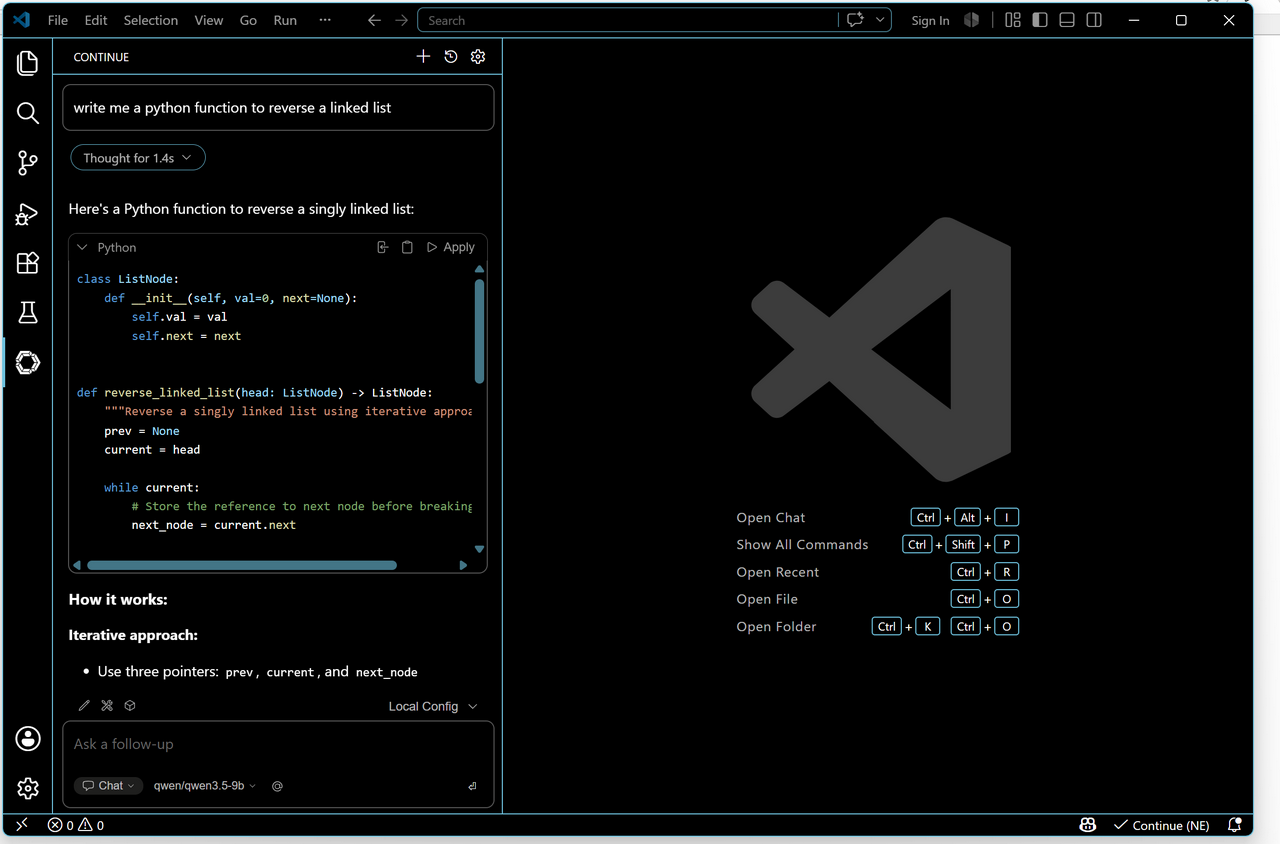
What Can You Use It For?
- Explain code — highlight a function and ask what it does
- Debug errors — paste an error message and ask for fixes
- Generate boilerplate — “write a Python function that parses CSV and returns a list of dicts”
- Refactor — “rewrite this to use list comprehensions”
- Code review — paste a PR and ask for suggestions
- Learn new languages — ask it to write examples or explain syntax
Tips
- Use a bigger model for complex tasks. A 7B+ model will handle refactoring and architecture questions much better than a 3B model.
- Give it context. Continue can read your open files — make sure relevant code is open when you ask questions.
- The model isn't perfect. Always review suggested code. Local models are helpful but not infallible — especially on tricky edge cases.
- Keep LMStudio running. If you want the server to start automatically, enable the background service in LMStudio's settings.
Alternatives to Continue
Continue isn't the only option. Other popular VS Code extensions for local LLMs include:
- Continue (what I use — flexible, multi-provider)
- Cody (by Sourcegraph — good if you're already in their ecosystem)
- Codeium (free tier available, though the free tier uses cloud models)
If you're not using VS Code, LMStudio's server API is OpenAI-compatible, so most tools that support OpenAI endpoints should work — including JetBrains IDEs, Neovim, and more.